


 Translate
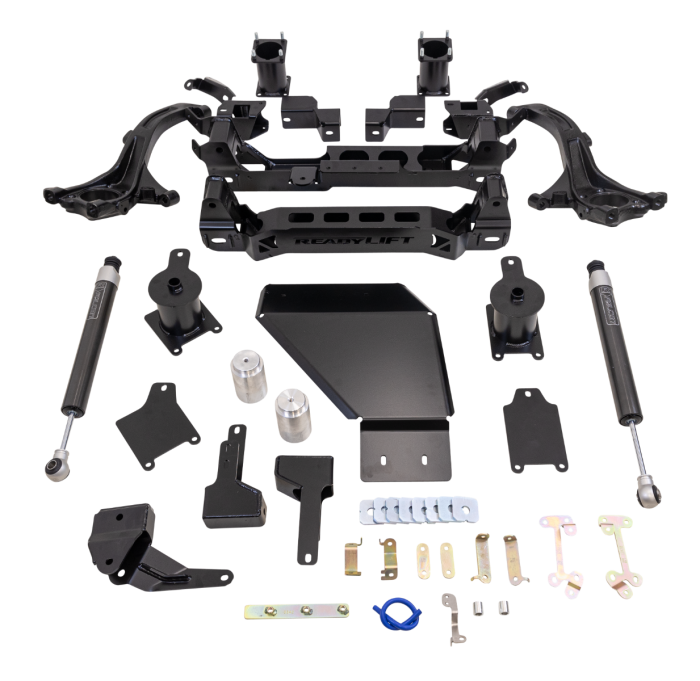
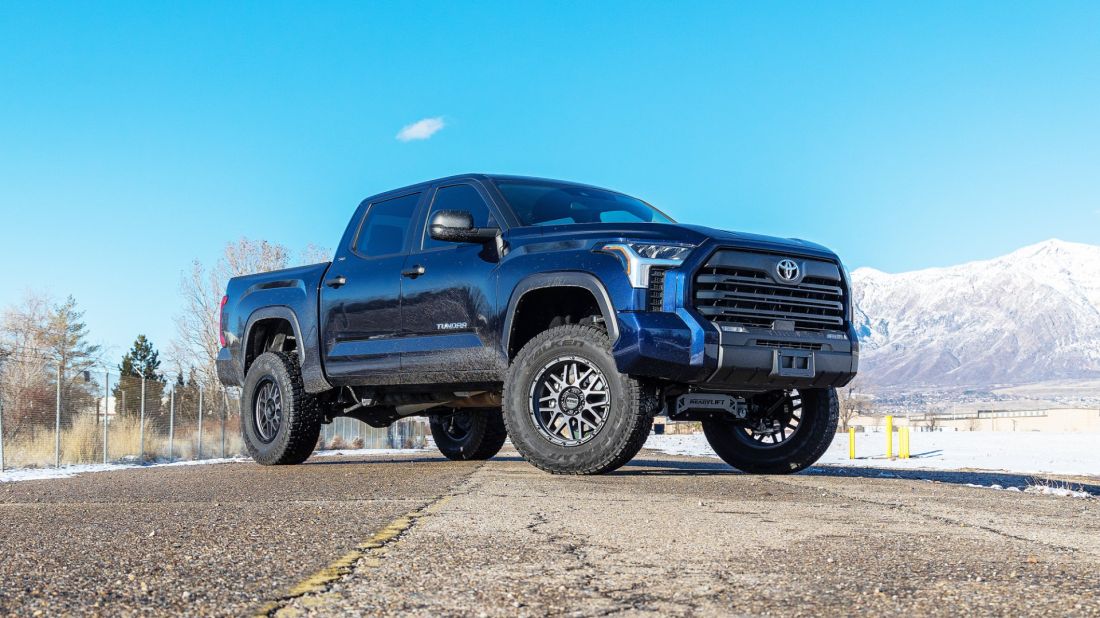
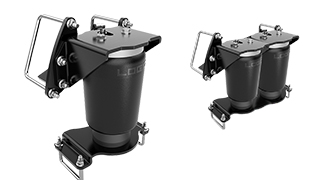
6" Big Lift Kit - 2022-2024 Toyota Tundra Rear Air 2WD/4WD
- Allows for 5.75" backspace (18-20mm Offset) on 20x9 with 35" tires
- Max tire with trimming 5.5" backspace (10-13mm Offset) on 20x9 with 37" tires
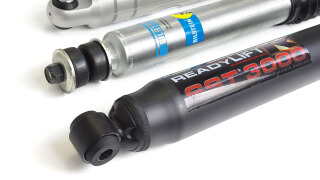
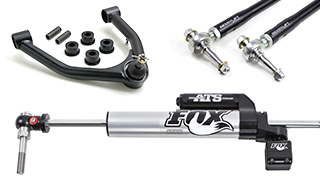
- Includes two Falcon 1.1 monotube rear shocks
- Retains factory turning radius
- Allows for use of stock 20” wheels
- Work with the auto adjust headlights
NOTE: Not for use on 2022+ Tundra TRD Pro w/ Bilstein coilover shocks, the TRD rear sway bar option. Kits only work with factory 20" wheels - will not work with factory 18" wheels. Most aftermarket wheels at 20" or larger are compatible (confirm fitment prior to installation). For Tundra with Rear Coil Spring use part number 44-52620. ReadyLIFT’s new Toyota Tundra High-Performance CV Axle (PN: 67-52420CV) kits are recommended on all lifted 22-UP Tundra's. Failure to use these axle shafts may lead to damage if used in 4WD not covered by the manufacturer.
- California Residents: Prop 65 WARNING
 Cancer, Birth Defects and Reproductive Harm www.P65Warnings.ca.gov
NOTE: Not for use on 2022+ Tundra TRD Pro w/ Bilstein coilover shocks, the TRD rear sway bar option or trucks equipped with Load-Leveling Rear Height Control Air Suspension or Adaptive Variable Suspension (AVS). Kits only work with factory 20" wheels - will not work with factory 18" wheels. Most aftermarket wheels at 20" or larger are compatible (confirm fitment prior to installation). For Tundra with Rear Coil Spring use part number 44-52620.
- Allows for 5.75" backspace (18-20mm Offset) on 20x9 with 35" tires
- Max tire with trimming 5.5" backspace (10-13mm Offset) on 20x9 with 37" tires
- Includes two Falcon 1.1 monotube rear shocks
- Retains factory turning radius
- Allows for use of stock 20” wheels
- Work with the auto adjust headlights
NOTE: Not for use on 2022+ Tundra TRD Pro w/ Bilstein coilover shocks, the TRD rear sway bar option. Kits only work with factory 20" wheels - will not work with factory 18" wheels. Most aftermarket wheels at 20" or larger are compatible (confirm fitment prior to installation). For Tundra with Rear Coil Spring use part number 44-52620. ReadyLIFT’s new Toyota Tundra High-Performance CV Axle (PN: 67-52420CV) kits are recommended on all lifted 22-UP Tundra's. Failure to use these axle shafts may lead to damage if used in 4WD not covered by the manufacturer.
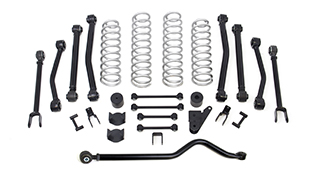
ReadyLIFT has had tremendous success with our leveling and SST lift kits for the 2022-UP Toyota Tundra and we are excited to announce two all-new suspension solutions: our all-new Big 6” lift kits for trucks equipped with rear coil spring and factory air configuration. Drawing on our Tundra first-class product success, ReadyLIFT Tundra 6” lift kits incorporate our all-new Falcon 1.1 monotube shocks specifically designed, engineered, and tuned for 2022+ Toyota Tundra Trucks!
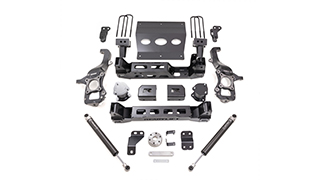
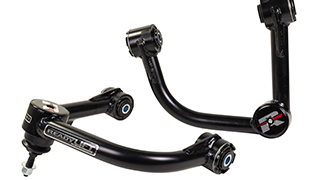
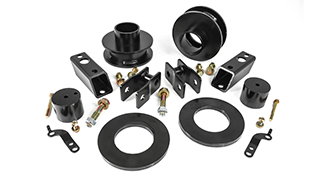
The all-new 6” lift kits for Tundra trucks are packed with great standard features! Starting with our ultra-strong laser cut, CNC bent, welded, and boxed sub-frame drop assemblies that maintain suspension geometry and increase available ground clearance! Our proprietary, precision-designed cast iron front knuckles feature CNC-machining to ensure fit while retaining the factory tie rods with minimal trimming required.
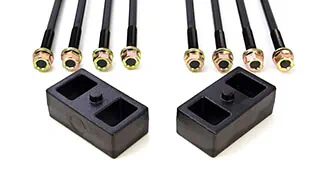
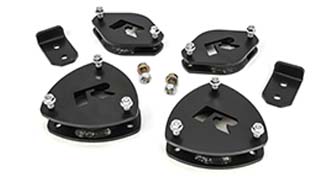
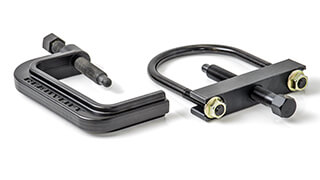
The ReadyLIFT sub-assembly design features a truly innovative approach to dropping the differential. The differential drop system is engineered for easy installation. The sub-assembly correctly positions the differential to maintain CV axle and driveline angles. With 44-52620 (non-rear air) & 44-52660 (with rear air) lift kits, you can rest assured premature tire wear won’t be an issue. The ReadyLIFT system is built around maintaining proper alignment and geometry specifications. Additionally, ReadyLIFT also includes thoughtful accessories such as new bump stop extensions all the way around as well as sway bar frame mount brackets to keep the front sway bar in a factory geometry. All of this contributes to an excellent driving and handling suspension system that truly elevates the typical Toyota Tundra truck!
6” Big Lift Features and Benefits:
· - Allows for 5.75" backspace (18-20mm Offset) on 20x9 with 35" tires
· - Max tire with trimming 5.5" backspace (10-13mm Offset) on 20x9 with 37" tires
· - Includes two Falcon 1.1 monotube rear shocks
·· - Retains factory turning radius
· - Allows for use of stock 20” wheels
NOTE: Not for use on 2022+ Tundra TRD Pro w/ Bilstein coilover shocks, the TRD rear sway bar option. Kits only work with factory 20" wheels - will not work with factory 18" wheels. Most aftermarket wheels at 20" or larger are compatible (confirm fitment prior to installation). ReadyLIFT’s new Toyota Tundra High-Performance CV Axle (PN: 67-52420CV) kits are recommended on all lifted 22-UP Tundra's. Failure to use these axle shafts may lead to damage if used in 4WD not covered by the manufacturer.
Allows for 5.75" backspace (18-20mm Offset) on 20x9 with 35" tires
Max tire with trimming 5.5" backspace (10-13mm Offset) on 20x9 with 37" tires
Tire Size Note: ReadyLIFT wheel and tire fitment recommendations are typically based on Wheel Pros wheels and Nitto tires. Due to product differences among tire manufacturers, tire specifications and dimensions including, but limited to, overall diameter, rolling diameter, tread width, aspect ratio, lug pattern, sidewall construction and inflation pressure, will vary meaningfully by tire and wheel manufacturer. Every tire and wheel combination should be test fit prior to installation. Consult your local installer to learn more about the right tire fitment for your application.
Ride Quality Note: When lifting a vehicle and installing aftermarket wheels and tires, a tire manufacturer's construction and material quality can alter vehicle ride quality. When increasing a vehicle wheel and tire size, most larger aftermarket truck and SUV tires are 10-ply (or more) E tires compared to typical OEM 6-ply C tires. This more rigid sidewall construction increases the perception of suspension stiffness often described as ride harshness. The ride, handling, traction, noise, fuel economy, and wear differences between All-Season, All-Terrain, Mud-Terrain, or Trail-Terrain type tires can be significant. Please take into account tire and wheel choice will generally have a meaningful impact on the ride & handling experience.
Front Crossmember, Rear Crossmember, Skid Plate, Front Brake Line Bracket - Right 2, Front Brake Line Bracket - Right 1, Front Brake Line Bracket - Left 1, Front Brake Line Bracket - Left 2, Knuckle - Left Hand Side, Knuckle - Right Hand Side, Front Strut Spacer, Front Sway Bar Drop - Left, Front Sway Bar Drop - Right, Cam Block Off Plates, Headlight Sensor Bracket Sleeve and HSB-Left, Front Bump Stop - Left, Front Bump Stop - Right, Rear Crossmember Nut Plate, 1/4" Front Differential Vent Hose, Rear Trackbar Bracket, Rear Sway Bar Drop - Left, Rear Sway Bar Drop - Right, Rear Bump Stop - Left, Rear Bump Stop - Right, Rear ABS Relocator, Rear ABS Bracket, Falcon 1.1 Rear Shock, Hardware pack for 44-52620, Hardware pack for 44-52660 AIR SPACERS, REAR AIR SPACER RIGHT, REAR AIR SPACER LEFT, REAR AIR SPACER PLATE RIGHT, REAR AIR SPACER PLATE LEFT, AIR SENSOR BRACKET LEFT, AIR SENSOR BRACKET RIGHT, REAR AIR SPACER NUT, M10-1.5 LOCK NUT, Hardware pack, Instruction manual
SAEJ2492 WARNING: By installing this product, you acknowledge that the suspension of this vehicle has been modified. As a result, this vehicle may handle differently than factory-equipped vehicles. As with any vehicle, extreme care must be used to prevent loss of control or rollover during sharp turns or abrupt maneuvers. Always wear seat belts, and drive safely, recognizing that reduced speeds and specialized driving techniques may be required. Failure to drive this vehicle safely may result in serious injury or death. Do not drive this vehicle unless you are familiar with its unique handling characteristics and are confident of your ability to maintain control under all driving conditions. Some modifications (and combinations of modifications) are not recommended and may not be permitted in your state. Consult your owner's manual, the instructions accompanying this product, and state laws before undertaking these modifications. You are responsible for the legality and safety of the vehicle you modify using these components.
INSTALLATION ALIGNMENT NOTE: Your vehicle may require alignment after product installation. You may incur additional costs to align the vehicle.
INSTALLATION HEADLAMP AIM NOTE: In addition to your vehicle alignment, for your safety and others, it is necessary to check and adjust your vehicle headlamps for proper aim and alignment after product installation. You may incur additional costs to adjust the headlamp system.
INSTALLATION ADVANCED DRIVER ASSISTANCE SYSTEMS (ADAS) NOTE: If your vehicle is equipped with active or passive safety/collision monitoring and/or assistance/avoidance systems including, but not limited to, camera- or radar/sonar-based systems, check and adjust your vehicle’s systems for proper aim and function after product installation. In some instances, your vehicle may require OEM dealer service tools and factory-trained technicians to re-calibrate ADAS. You may incur additional costs to adjust ADAS systems.
Have a certified mechanic do it for you!
Cancer, Birth Defects and Reproductive Harm www.P65Warnings.ca.govNOTE: Not for use on 2022+ Tundra TRD Pro w/ Bilstein coilover shocks, the TRD rear sway bar option or trucks equipped with Load-Leveling Rear Height Control Air Suspension or Adaptive Variable Suspension (AVS). Kits only work with factory 20" wheels - will not work with factory 18" wheels. Most aftermarket wheels at 20" or larger are compatible (confirm fitment prior to installation). For Tundra with Rear Coil Spring use part number 44-52620.